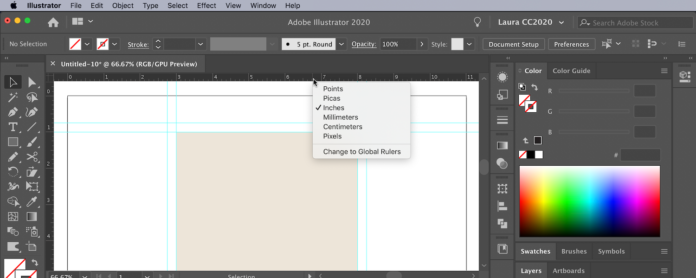
Guides in Adobe Illustrator are essential for precise design work. They help align objects, maintain consistency, and improve workflow efficiency. This tutorial will walk you through setting up and using guides effectively, covering everything from enabling guides to troubleshooting common issues.
What are Guides in Adobe Illustrator?
Guides are non-printing lines that help designers align objects in Illustrator. They can be placed manually or generated automatically to assist in maintaining accuracy in design layouts.
Step 1: Enabling Rulers in Illustrator
Before creating guides, ensure rulers are visible. Rulers allow you to drag guides directly from them.
How to Show Rulers:
- Open Adobe Illustrator and create a new document.
- Go to View > Rulers > Show Rulers (Shortcut:
Ctrl + Ron Windows /Cmd + Ron Mac). - The rulers will appear along the top and left edges of the workspace.
- If you ever need to hide them, go to View > Rulers > Hide Rulers.
Step 2: Creating Guides in Illustrator
There are two primary ways to create guides in Illustrator: dragging them from the rulers or converting objects into guides.
Method 1: Dragging from Rulers
- Click and drag from the horizontal ruler to create a horizontal guide.
- Click and drag from the vertical ruler to create a vertical guide.
- Release the mouse when the guide is in the desired position.
Method 2: Convert Objects to Guides
- Select an existing shape or object.
- Go to View > Guides > Make Guides (Shortcut:
Ctrl + 5/Cmd + 5on Mac). - The object will be converted into a non-printing guide.
Step 3: Adjusting Guides for Precision
After creating guides, you may need to move, lock, or customize them for better accuracy.
Moving Guides
- Use the Selection Tool (
Vkey) to click and drag a guide to a new position.
Locking Guides to Prevent Accidental Movement
- To prevent accidental movement, lock the guides:
- Go to View > Guides > Lock Guides (
Alt + Ctrl + ;/Option + Cmd + ;on Mac).
- Go to View > Guides > Lock Guides (
Unlocking Guides
- To modify a locked guide, unlock them:
- Go to View > Guides > Unlock Guides (
Alt + Ctrl + ;/Option + Cmd + ;on Mac).
- Go to View > Guides > Unlock Guides (
Changing the Color of Guides
- Open the Preferences Panel:
- Windows: Edit > Preferences > Guides & Grid
- Mac: Illustrator > Preferences > Guides & Grid
- Choose a new guide color that improves visibility against your design background.
Step 4: Removing or Hiding Guides
If you no longer need the guides, you can remove or hide them.
Delete Individual Guides
- Select a guide and press Delete.
Clear All Guides
- To remove all guides at once, go to View > Guides > Clear Guides.
Hide Guides Temporarily
- If you want to keep guides but hide them temporarily:
- Go to View > Guides > Hide Guides (
Ctrl + ;/Cmd + ;on Mac). - To show them again, select View > Guides > Show Guides.
- Go to View > Guides > Hide Guides (
Step 5: Using Smart Guides for Automatic Alignment
What are Smart Guides?
Smart Guides provide real-time alignment and spacing assistance as you move objects. They appear as temporary guides to help with positioning.
How to Enable Smart Guides
- Go to View > Smart Guides (Shortcut:
Ctrl + U/Cmd + U). - When enabled, Illustrator will display snapping indicators for easier alignment.
Benefits of Smart Guides
- Automatic snapping to edges, centers, and anchor points.
- Helps maintain even spacing between objects.
- Reduces manual guide placement for faster design workflow.
Step 6: Troubleshooting Guide Issues
Why Are My Guides Not Showing?
- Make sure guides are enabled: View > Guides > Show Guides (
Ctrl + ;/Cmd + ;). - Ensure that your guides are not hidden or locked.
Why Can’t I Move My Guides?
- If guides are locked, unlock them from View > Guides > Unlock Guides.
How to Stop Objects from Snapping to Guides?
- Disable Snap to Point under View > Snap to Point.
- If Snap to Grid is interfering, disable it in View > Snap to Grid.
Best Practices for Using Guides in Illustrator
1. Organize Your Guides by Layers
- Keep guides in separate layers for better management.
- Lock the guide layer to prevent accidental edits.
2. Use Different Colors for Different Guides
- Assign different colors to horizontal, vertical, and object-based guides for easy identification.
3. Combine Smart Guides and Manual Guides
- Smart Guides help with quick alignment, but manual guides provide better control for complex layouts.
4. Adjust Guides for Precision
- Use Transform Panel (
Window>Transform) to enter exact guide positions.
5. Save Guide Layouts for Future Use
- Create guides in a separate layer and save them as part of your template for consistency across projects.
Conclusion
Guides in Adobe Illustrator are a powerful tool for achieving precision and alignment in design. By mastering guides, you can create professional-quality artwork with consistent layout structures. Whether you use manual guides, Smart Guides, or a combination of both, integrating them into your workflow will enhance efficiency and accuracy. With the knowledge of how to enable, adjust, lock, remove, and customize guides, you are well-equipped to improve your design process and create visually polished projects.


